If someone asked you to name the tightest part of your body, you’d probably say your hips or hamstrings. But calves and ankles are quietly competing for the top spot, and almost nobody pays them enough attention.
Tight calves don’t just make your lower legs feel stiff. They kick off a chain reaction that travels upward through your entire body. Limited ankle mobility changes how your knees track during movement. That altered movement pattern shifts stress to your hips. Your lower back compensates. Before long, a problem that started at your ankle is causing pain two or three joints away.
Plantar fasciitis, Achilles tendinitis, shin splints, knee pain during squats, and even recurring lower back discomfort can all trace part of their origin back to restricted calf and ankle mobility. And the fix is surprisingly straightforward once you understand what’s happening.
This guide covers the anatomy behind calf tightness and ankle restriction, the best stretches and mobility drills backed by research, and how to build a practical routine that fits your life, whether you’re a runner, a desk worker, or someone who just wants to move better.
Why Calf Flexibility and Ankle Mobility Matter
Your ankle is the first major joint to absorb force when you walk, run, jump, or squat. If it can’t move through its full range, every joint above it has to pick up the slack.
The most important ankle movement for daily function is dorsiflexion, the ability to bring your toes toward your shin. You need dorsiflexion to walk downhill, descend stairs, squat, and run. When dorsiflexion is limited, your body finds workarounds: your feet pronate excessively, your knees cave inward, or your heels lift early during a squat.
This concept is called the kinetic chain. Your body is a linked system, and a restriction at one point creates compensations at others. Tight calves reduce ankle dorsiflexion, and reduced dorsiflexion is associated with increased injury risk across multiple sports and activities.
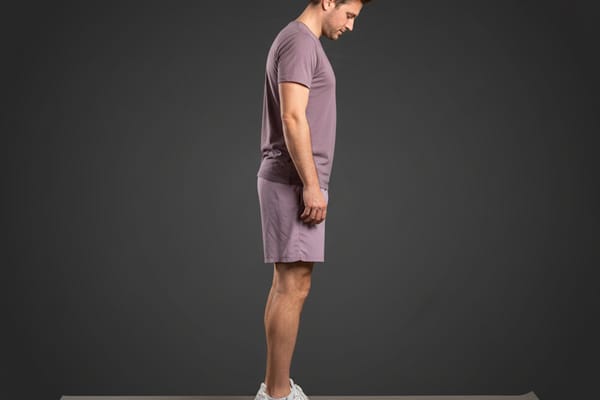
Quick Dorsiflexion Test
Try this simple test to check your ankle mobility:
- Face a wall and place one foot about 10 cm (4 inches) from the baseboard
- Keeping your heel flat on the ground, try to touch your knee to the wall
- If you can touch the wall, move your foot back slightly and try again
- Measure the maximum distance where your knee can still touch the wall with your heel down
What the numbers mean: A distance of about 10-12 cm (4-5 inches) is considered adequate dorsiflexion. Less than 10 cm suggests restriction that could benefit from targeted work. If there’s a significant difference between sides, that asymmetry is worth addressing.
What Research Says
The relationship between ankle mobility and injury risk has been studied extensively, and the findings make a strong case for including calf and ankle work in your routine.
A 2015 study published in the Journal of Athletic Training found that limited ankle dorsiflexion was a significant predictor of lower extremity injury in athletes. Participants with restricted dorsiflexion had nearly five times the risk of ankle sprains compared to those with normal range of motion.1
Research on squat mechanics has shown that restricted ankle dorsiflexion directly limits squat depth and alters movement patterns. A study in the Journal of Strength and Conditioning Research demonstrated that individuals with limited dorsiflexion exhibited greater forward trunk lean and increased knee valgus (inward collapse) during squats, both of which increase injury risk at the knee and lower back.2
For older adults, ankle mobility plays a critical role in balance and fall prevention. A systematic review in Gait & Posture found that reduced ankle dorsiflexion range of motion was consistently associated with impaired balance and increased fall risk in elderly populations. The researchers noted that calf stretching programs improved both dorsiflexion and balance scores.3
Static calf stretching has also been shown to effectively increase ankle range of motion. A randomized controlled trial found that just five minutes of daily gastrocnemius stretching over six weeks produced significant improvements in dorsiflexion, with gains maintained at a four-week follow-up.4
Understanding Calf and Ankle Anatomy
Your calf is not a single muscle, and that matters for how you stretch it. The two primary calf muscles have different attachment points, which means they respond to different stretching positions.
The Gastrocnemius
The gastrocnemius is the larger, more visible calf muscle that gives the lower leg its distinctive shape. It has two heads (medial and lateral) that originate above the knee on the femur (thigh bone) and attach to the heel via the Achilles tendon.
Because the gastrocnemius crosses both the knee joint and the ankle joint, it can only be fully stretched when the knee is straight. This is why the classic wall calf stretch is performed with a straight back leg. If you bend the knee, you take slack off the gastrocnemius and shift the stretch to the soleus.
The gastrocnemius is primarily a fast-twitch muscle, responsible for powerful movements like jumping, sprinting, and pushing off while walking. It tends to become tight in people who run, cycle, or wear shoes with elevated heels.
The Soleus
The soleus sits underneath the gastrocnemius. It originates on the tibia and fibula (lower leg bones) and also attaches to the heel via the Achilles tendon. Crucially, it does not cross the knee joint.
To stretch the soleus, you need to bend the knee. This takes the gastrocnemius out of the equation and directs the stretch to the deeper muscle. Many people stretch their calves exclusively with straight-leg positions and wonder why they still feel tight. The soleus is often the missing piece.
The soleus is predominantly a slow-twitch endurance muscle. It works constantly during standing and walking to prevent you from falling forward. Because of this sustained workload, the soleus is prone to chronic tightness, especially in people who stand for long periods.
The Achilles Tendon
The Achilles tendon is the thick band of tissue that connects both calf muscles to the calcaneus (heel bone). It is the strongest tendon in the body, capable of handling forces of six to eight times body weight during running.
The Achilles tendon itself doesn’t stretch the way muscle does. It remodels gradually over time in response to consistent, gentle loading. This is why aggressive or bouncing calf stretches can irritate the Achilles, while steady, sustained stretches tend to be better tolerated.
If you have Achilles tendon issues, focus on gentle calf stretching with slow, controlled movements rather than deep, forceful stretches.
Why You Need Different Stretches
Because the gastrocnemius and soleus have different attachment points, you need at least two stretching positions to address both:
- Straight-knee stretches target the gastrocnemius
- Bent-knee stretches target the soleus
Neglecting either muscle leaves part of your calf tight, which limits your total ankle dorsiflexion. A complete calf stretching routine includes both positions.
The Best Calf Stretches
These stretches target the gastrocnemius, soleus, and surrounding tissues. Hold each for 30 to 60 seconds unless otherwise noted, and work both legs.
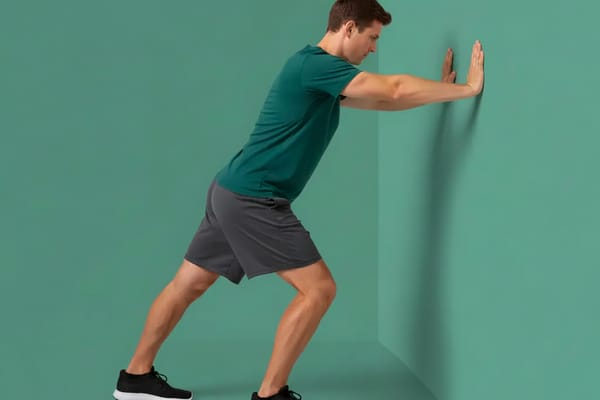
1. Wall Calf Stretch (Leaning Calf)
What it targets: Gastrocnemius (upper calf)
Why it works: The straight back leg and wall support allow you to control the stretch intensity precisely. Because the knee stays straight, the gastrocnemius is placed on full stretch. This is the most accessible and effective starting point for calf flexibility.
How to do it:
- Stand facing a wall with hands at shoulder height
- Step one foot back about 60-90 cm (2-3 feet)
- Keep the back leg straight and the heel firmly on the ground
- Lean into the wall by bending the front knee
- You should feel the stretch in the upper calf of the back leg
- Hold 30-60 seconds, then switch sides
Key point: Keep your back heel glued to the floor. If it lifts, you’ve stepped too far back. Shorten the stance until you can maintain heel contact while still feeling a stretch.
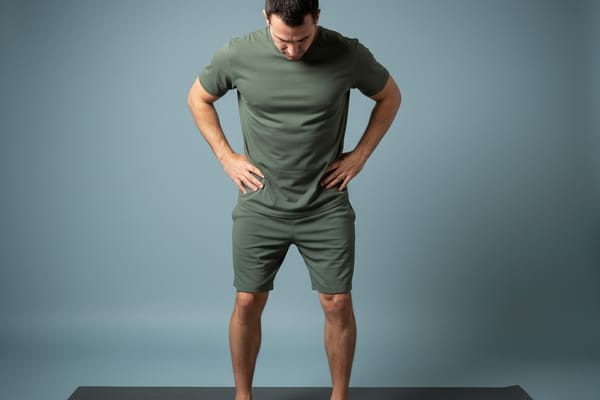
2. Bent-Over Calf Stretch
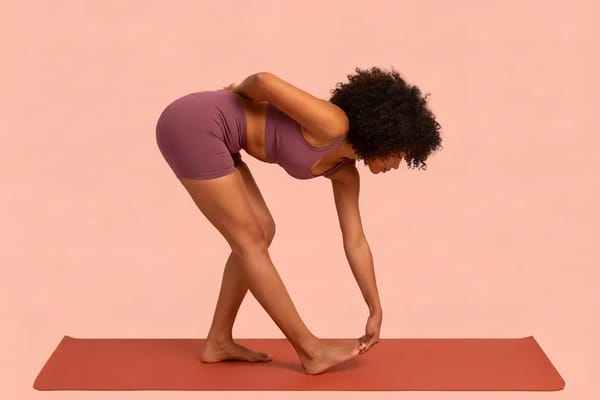
What it targets: Gastrocnemius with added hamstring involvement
Why it works: By hinging at the hips with straight legs, you stretch the entire posterior chain from the calves through the hamstrings. This mimics the lengthened position your calves experience during activities like running and walking uphill.
How to do it:
- Stand with feet hip-width apart
- Hinge forward at the hips, reaching toward the ground
- Keep your legs straight and your heels pressing into the floor
- Let your weight shift slightly toward your toes to increase the calf stretch
- Hold 30-45 seconds
Key point: If you can’t reach the ground comfortably, place your hands on a low surface like a step or yoga block. The goal is the calf stretch, not touching the floor.
3. Soleus Stretch
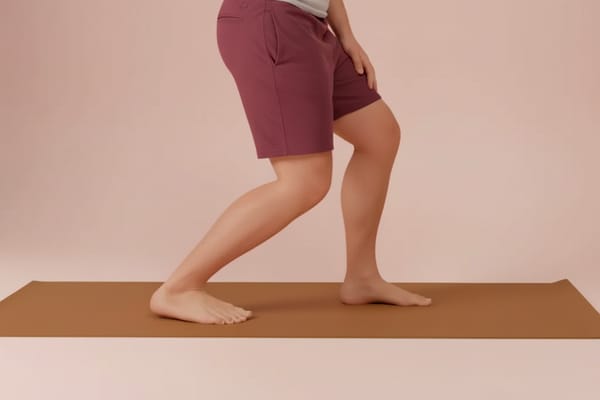
What it targets: Soleus (deeper calf muscle)
Why it works: Bending the knee takes the gastrocnemius out of the equation, isolating the soleus. Many people skip this stretch entirely, leaving the deeper calf muscle chronically tight. The soleus is often the real limiting factor in ankle dorsiflexion.
How to do it:
- Stand facing a wall in a staggered stance (similar to the wall calf stretch)
- Bend the back knee while keeping the heel on the floor
- Lean your body weight forward and downward
- The stretch should be felt lower in the calf, closer to the Achilles area
- Hold 30-60 seconds per side
Key point: The difference between this and the wall calf stretch is simply the bent knee. You should feel the stretch shift from the upper calf to a deeper, lower position. If you don’t feel much, try bringing the back foot closer to the wall.
4. Downward Dog
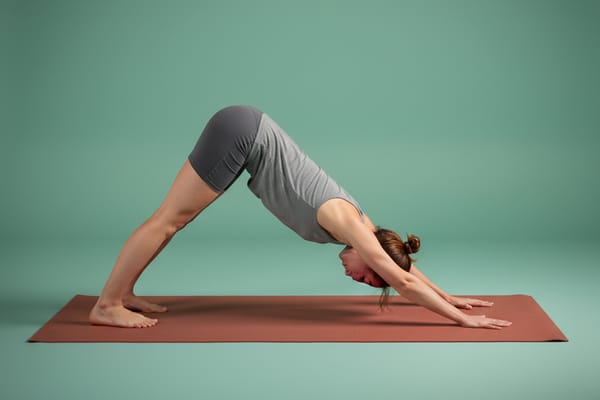
What it targets: Both calf muscles, hamstrings, and shoulders
Why it works: Downward dog stretches the calves under body weight while also addressing the hamstrings and shoulders. The alternating heel press variation lets you work each calf individually with natural body weight loading.
How to do it:
- Start on hands and knees, then lift your hips up and back
- Form an inverted V shape with your body
- Press your heels toward the ground
- For a dynamic variation, alternate pressing one heel down while bending the opposite knee (“walking the dog”)
- Hold the static position for 30-45 seconds, or alternate sides for 8-10 presses each
Key point: Your heels don’t need to touch the floor. The stretch happens as you actively press them downward. Over time, you’ll get closer to the ground as your calf flexibility improves.
5. Step Drop Stretch
What it targets: Gastrocnemius and Achilles tendon
Why it works: Using a step allows gravity to create the stretch, which can access a deeper range than wall stretches. The eccentric loading is also beneficial for Achilles tendon health when done gently.
How to do it:
- Stand on a step or curb with the balls of your feet on the edge
- Let one heel drop below the level of the step
- Keep that leg straight for a gastrocnemius focus
- Hold 30-45 seconds per side
- For a soleus variation, slightly bend the knee of the stretching leg
Key point: Lower yourself slowly and controlled. Dropping quickly or bouncing puts excessive stress on the Achilles tendon. If you have Achilles issues, use this stretch cautiously or skip it in favor of the wall variations.
6. Seated Calf Stretch with Towel
What it targets: Gastrocnemius and soleus
Why it works: This is a gentle option for people who find standing stretches too intense or those recovering from calf or Achilles injuries. The towel gives you control over the intensity.
How to do it:
- Sit on the floor with one leg extended straight
- Loop a towel or strap around the ball of the extended foot
- Gently pull the towel toward you, flexing the foot
- Keep the knee straight for a gastrocnemius stretch, or slightly bent for the soleus
- Hold 30-60 seconds per side
Key point: Pull slowly and steadily. The stretch should feel firm but not painful. This position is especially useful first thing in the morning when calves tend to be their tightest.
The Best Ankle Mobility Exercises
While calf stretches address muscle tightness, these mobility drills work on the ankle joint itself, improving the quality and range of movement at the joint capsule level.
1. Ankle Circles
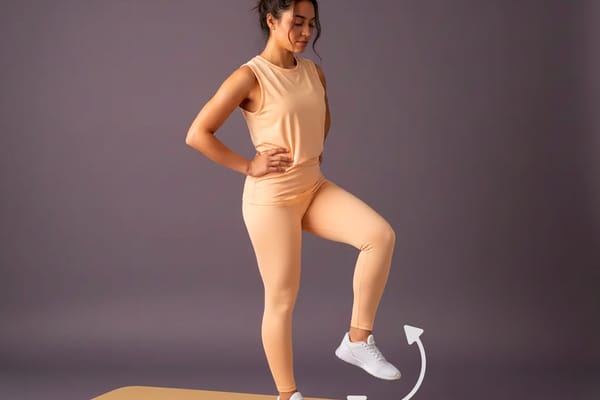
What it targets: Ankle joint capsule, all surrounding tissues
Why it works: Ankle circles move the joint through its full range in every direction. This promotes synovial fluid production (the joint’s natural lubricant), warms up the surrounding tissues, and highlights any directions where movement is restricted.
How to do it:
- Sit or stand on one leg (hold something for balance if needed)
- Lift one foot off the ground
- Draw slow, controlled circles with your toes, making the circles as large as possible
- Complete 10-15 circles in each direction, then switch feet
Key point: Go slowly and make deliberate, full circles. Most people rush through these and make tiny, incomplete circles. Bigger and slower is better. If you notice a “sticky” or restricted spot in the circle, spend extra time working through that range.
2. Heel-to-Toe Rocks
What it targets: Ankle dorsiflexion and plantarflexion (the forward and backward range)
Why it works: This exercise actively moves the ankle through its most functional range of motion while bearing weight. The rocking motion mimics the ankle movement patterns used during walking and running, making it highly transferable to real activities.
How to do it:
- Stand with feet hip-width apart, near a wall or chair for balance
- Rock forward onto your toes, lifting your heels as high as possible
- Then rock backward onto your heels, lifting your toes off the ground
- Move smoothly between the two positions
- Complete 15-20 rocks
Key point: Control the transition between positions. The tendency is to rush, but the mobility benefit comes from the slow, controlled movement through the full range. Think of it as a pendulum, smooth and rhythmic.
3. Lateral Foot Rocks
What it targets: Ankle inversion and eversion (side-to-side range)
Why it works: Most ankle mobility work focuses on forward and backward movement, but lateral (side-to-side) mobility is essential for stability on uneven surfaces and for preventing ankle sprains. This exercise trains a range that most people neglect entirely.
How to do it:
- Stand with feet hip-width apart
- Roll onto the outer edges of your feet (inversion)
- Then roll onto the inner edges (eversion)
- Move slowly and with control between positions
- Complete 15-20 rocks
Key point: Keep the movements small and controlled, especially if you have a history of ankle sprains. This should feel like gentle mobilization, not an aggressive stretch. Over time, you can increase the range as your ankles become more stable.
4. Toe Raises
What it targets: Tibialis anterior (front of shin), active dorsiflexion strength
Why it works: Most people focus only on stretching the calves to improve dorsiflexion, but strengthening the opposing muscles (the ones that pull your toes up) is equally important. Weak tibialis anterior muscles can’t effectively pull the ankle into dorsiflexion, limiting your functional range even if the calves are flexible.
How to do it:
- Stand with your back against a wall, heels about 15 cm (6 inches) from the wall
- Lift your toes and the balls of your feet off the ground, keeping your heels down
- Lift as high as you can, pause briefly at the top
- Lower slowly
- Complete 15-20 repetitions
Key point: You should feel the muscles on the front of your shin working. If you get a burning sensation there, that’s normal and indicates these muscles need the work. This exercise also helps prevent shin splints.
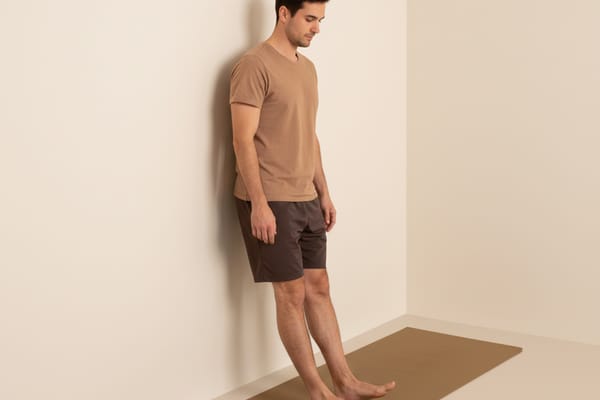
5. Wall-Facing Ankle Mobilization
What it targets: Ankle dorsiflexion with joint capsule mobilization
Why it works: This drill specifically targets the joint restriction that limits dorsiflexion. By driving the knee forward over the toes under body weight, you apply a gentle mobilization force to the ankle joint while simultaneously stretching the calf muscles. This is essentially a loaded version of the dorsiflexion test described earlier.
How to do it:
- Face a wall and place one foot about 10 cm (4 inches) away
- Drive your knee forward toward the wall while keeping the heel flat
- Push the knee as far forward as possible without the heel lifting
- Return to the start and repeat 10-15 times per side
- Gradually increase the foot’s distance from the wall as mobility improves
Key point: Your knee should track over your second or third toe, not collapsing inward. If the knee drifts inward, reduce the range and focus on proper alignment. This is the single most effective drill for improving ankle dorsiflexion.
Why Your Calves Are Always Tight
Understanding the root causes of calf tightness helps you address the problem at its source, not just manage the symptoms with stretching.
Shoes With Elevated Heels
Most conventional shoes have a heel-to-toe drop of 10-12 mm. This keeps the calf muscles in a slightly shortened position all day. Over months and years, the muscles adapt to this shortened length and resist being stretched to their full range. Even athletic shoes typically have significant heel elevation.
What to do: Consider transitioning gradually to lower-drop shoes for casual wear. Emphasis on gradually, as sudden changes can cause Achilles problems. Reduce the heel drop by a few millimeters at a time over several months.
Prolonged Sitting
When you sit with your feet flat on the floor and knees bent at 90 degrees, your calves are in a shortened position. Hours of this daily contributes to adaptive shortening.
What to do: Take brief breaks to stand and perform a few heel raises or calf stretches. Even 30 seconds of ankle circles under your desk helps break up the static positioning.
Running and Walking Volume
Calves absorb significant force during running (approximately 6-8 times body weight per stride) and walking. High training volume without adequate recovery and stretching leads to cumulative tightness.
What to do: Include calf stretching in your post-workout routine. Even five minutes of focused calf work after running makes a noticeable difference within a few weeks.
Dehydration and Electrolyte Imbalance
Calf muscles are particularly prone to cramping and tightness when dehydrated or low on electrolytes, especially magnesium and potassium. This is because the calf muscles have such a high work volume during daily activity.
What to do: Stay consistently hydrated throughout the day, not just during workouts. If you experience frequent calf cramping, evaluate your electrolyte intake.
Nerve Involvement
Sometimes what feels like calf tightness is actually neural tension from the sciatic nerve or its branches. The nerve runs through the back of the leg and can create a sensation of tightness that doesn’t respond well to traditional stretching.
What to do: If calf stretching doesn’t improve the sensation after several weeks of consistent work, consider consulting a physical therapist who can assess whether neural tension is a factor.
Calf Stretches for Specific Activities
For Runners
Runners place extraordinary demands on their calves. Each foot strike requires the calf muscles to absorb and return energy, and the cumulative load of thousands of strides per run creates significant tightness.
Pre-run: Use dynamic mobility work rather than static stretching. Heel-to-toe rocks (15-20 reps), ankle circles (10 each direction per foot), and walking calf raises prepare the muscles for the demands of running without reducing their contractile power.
Post-run: This is when static calf stretching is most effective. Hold each stretch for 45-60 seconds:
- Wall calf stretch (straight leg) for the gastrocnemius
- Soleus stretch (bent knee) for the deeper muscle
- Downward dog for a combined stretch
Weekly maintenance: Include 2-3 sessions of focused calf and ankle work, about 10-15 minutes each. Our Post-Run Reset routine is designed specifically for this purpose.
For Desk Workers
Sitting all day keeps calves in a shortened position and reduces blood flow to the lower legs. The result is chronic low-grade tightness that accumulates over time.
During the workday: Set a reminder to do ankle circles under your desk every hour. Stand up and perform 10 heel raises and 10 heel-to-toe rocks. These micro-breaks take less than a minute and prevent tightness from building.
End of day: Spend 5 minutes on:
- Wall calf stretch, 45 seconds per side
- Soleus stretch, 45 seconds per side
- Ankle circles, 15 each direction per foot
- Heel-to-toe rocks, 20 reps
Weekly: Follow a full ankle mobility routine like Foot and Ankle Wake-Up two to three times per week.
For Weightlifters
Limited ankle dorsiflexion is one of the most common reasons lifters struggle with squat depth. When the ankles can’t dorsiflex enough, the torso compensates with excessive forward lean, shifting stress to the lower back and reducing leg drive.
Before squatting: Wall-facing ankle mobilizations are the single best prep exercise. Do 10-15 reps per side before any squatting session. Follow with bodyweight squats, paying attention to keeping heels flat.
Regular practice: The soleus stretch is particularly important for lifters because the knee is bent during squats, meaning the soleus is the primary calf muscle affecting squat-specific dorsiflexion. Stretch the soleus daily, holding for 60 seconds per side.
Note on weightlifting shoes: Elevated-heel shoes work around dorsiflexion limitations but don’t fix them. They’re a useful tool in the short term, but building genuine ankle mobility gives you better long-term results and makes you less dependent on specific equipment.
Building a Calf and Ankle Routine
Consistency matters more than duration when it comes to calf and ankle work. A short routine done daily beats a long routine done occasionally.
Daily Minimum (5 minutes)
This is the baseline that everyone should aim for:
- Ankle circles: 10 each direction, each foot (2 minutes)
- Wall calf stretch: 45 seconds per side (1.5 minutes)
- Soleus stretch: 45 seconds per side (1.5 minutes)
Full Routine (10-15 minutes, 3-4 times per week)
For more comprehensive improvement:
- Ankle circles: 15 each direction, each foot
- Heel-to-toe rocks: 20 reps
- Lateral foot rocks: 15 reps
- Wall calf stretch: 60 seconds per side
- Soleus stretch: 60 seconds per side
- Downward dog: 45 seconds (or alternating heel presses, 10 each side)
- Wall-facing ankle mobilization: 15 reps per side
- Toe raises: 20 reps
When to Stretch
Best times for calf stretching:
- After any physical activity (running, walking, gym work)
- In the evening, when muscles are warm from daily movement
- After a warm shower or bath
Avoid:
- Deep static calf stretching immediately before explosive activities (sprinting, jumping)
- Aggressive stretching when the Achilles tendon is cold or sore
How Long Before You See Results
With consistent daily stretching, most people notice improved calf flexibility within 2-3 weeks. Measurable changes in ankle dorsiflexion typically take 4-6 weeks. If you’re starting from significant restriction, allow 8-12 weeks for substantial improvement.
The key is daily consistency rather than occasional intense sessions. Your calves respond better to frequent, moderate stretching than to infrequent deep stretching.
Frequently Asked Questions
How long should I hold a calf stretch?
Hold static calf stretches for 30-60 seconds per side. Research shows that 30 seconds is the minimum effective duration for creating lasting changes in muscle length. For the calves specifically, 45-60 seconds tends to produce better results because these muscles are so accustomed to constant use.
Should I stretch my calves before running?
Before running, use dynamic movements like heel-to-toe rocks, ankle circles, and walking calf raises rather than static stretches. Static stretching before explosive activity can temporarily reduce muscle power. Save the longer, static holds for after your run.
Can tight calves cause plantar fasciitis?
Yes. The plantar fascia connects to the Achilles tendon, which connects to the calf muscles. Research has consistently shown that calf tightness is one of the strongest risk factors for developing plantar fasciitis. Regular calf stretching is both a prevention strategy and a treatment component.
Is it normal for only one calf to be tight?
Asymmetry between calves is very common. It can result from a dominant leg preference, a previous injury, or differences in how you walk or stand. If one calf is significantly tighter than the other, give that side extra stretching time (an additional 30 seconds per stretch) until the imbalance improves.
Why do my calves cramp at night?
Nocturnal calf cramps are often related to dehydration, electrolyte imbalance (particularly magnesium), prolonged standing or activity during the day, or a combination of these factors. Gentle calf stretching before bed and staying well-hydrated can reduce the frequency of nighttime cramps.
Should I use a foam roller on my calves?
Foam rolling can complement stretching by addressing muscular tension and trigger points. Use it before stretching to “release” tight spots, which can make the subsequent stretches more effective. Roll slowly along the calf, pausing on tender areas for 20-30 seconds. Avoid rolling directly on the Achilles tendon.
Related Articles
- Plantar Fasciitis Stretches: Evidence-Based Exercises
- Hamstring Stretches for Runners
- Complete Beginner’s Guide to Stretching
References
Hoch, M. C., et al. (2015). “Dorsiflexion range of motion significantly influences dynamic balance.” Journal of Athletic Training, 50(10), 1053-1059. ↩︎
Macrum, E., et al. (2012). “Effect of limiting ankle-dorsiflexion range of motion on lower extremity kinematics and muscle-activation patterns during a squat.” Journal of Sport Rehabilitation, 21(2), 144-150. ↩︎
Menz, H. B., et al. (2005). “Age-related differences in walking stability.” Gait & Posture, 23(1), 95-100. ↩︎
Radford, J. A., et al. (2006). “Does stretching increase ankle dorsiflexion range of motion? A systematic review.” British Journal of Sports Medicine, 40(10), 870-875. ↩︎